【Python】FullCalendarにログイン機能をつけてみる
おはようございます。
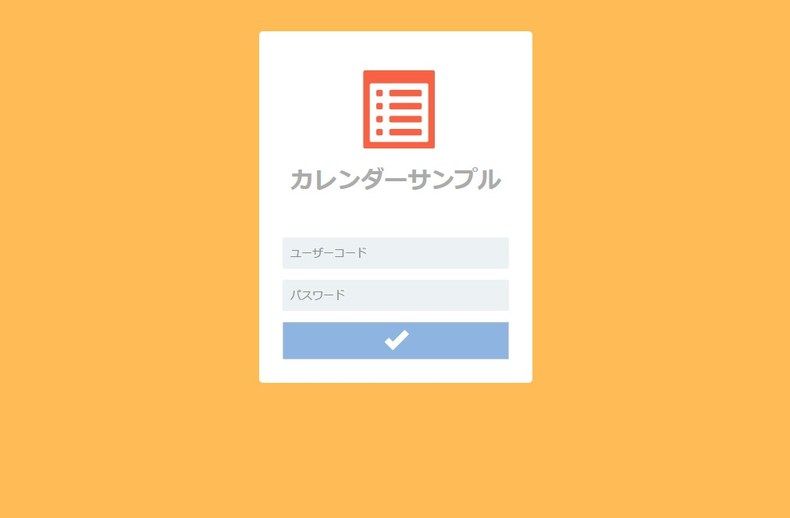
今回はログイン画面を追加して、
ユーザー毎にカレンダーを持てるようにしてみました。
ちょっと長くなってしまったので、ソースはそのうち Github のあげる予定です。
プログラムは前回のものを流用します。
スポンサーリンク
目次
テーブルの追加、修正
ユーザ、パスワード用にそれぞれテーブルを追加します。
-- MSTパスワード
create table MST_PASSWORD (
  USER_CD varchar(20) not null comment 'ユーザーコード'
  , PASSWORD varchar(128) not null comment 'パスワード'
  , CREATE_USER varchar(20) comment '作成者'
  , CREATE_DATE datetime comment '作成日時'
  , UPDATE_USER varchar(20) comment '更新者'
  , UPDATE_DATE datetime comment '更新日時'
  , constraint MST_PASSWORD_PKC primary key (USER_CD)
) comment 'MSTパスワード' ;

-- MSTユーザー
create table MST_USER (
  USER_CD varchar(20) not null comment 'ユーザーコード'
  , USER_NAME varchar(60) not null comment 'ユーザー名'
  , MAIL_ADDRESS varchar(128) comment 'メールアドレス'
  , DEFAULT_COLOR varchar(8) default '#FFFFFF' comment 'デフォルト背景色:#RGB形式'
  , CREATE_USER varchar(20) comment '作成者'
  , CREATE_DATE datetime comment '作成日時'
  , UPDATE_USER varchar(20) comment '更新者'
  , UPDATE_DATE datetime comment '更新日時'
  , constraint MST_USER_PKC primary key (USER_CD)
) comment 'MSTユーザー' ;

-- TBLスケジュール
create table TBL_SCHEDULE (
  USER_CD varchar(20) not null comment 'ユーザコード'
  , ID int(10) not null comment 'ID'
  , TITLE varchar(100) comment 'タイトル'
  , START datetime comment '開始日時'
  , END datetime comment '終了日時'
  , TEXTCOLOR varchar(20) comment '文字色'
  , COLOR varchar(20) default '#FFFFFF' comment '背景色:#RGB形式'
  , URL varchar(100) comment 'URL'
  , ALLDAY int(1) default 0 comment '終日フラグ:0:終日/1:時間指定'
  , DESCRIPTION varchar(1000) comment '説明'
  , CREATE_USER varchar(20) comment '作成者'
  , CREATE_DATE datetime comment '作成日時'
  , UPDATE_USER varchar(20) comment '更新者'
  , UPDATE_DATE datetime comment '更新日時'
  , constraint TBL_SCHEDULE_PKC primary key (USER_CD,ID)
) comment 'TBLスケジュール' ;
テーブルを作成したら、適当にユーザーの情報をインサートしておきましょう。
画面の追加、修正
CSSの追加
ログイン画面用のCSSを追加
login.css
body {
    background: #ffbb55 none repeat scroll 0 0;
}

.jumbotron {
   text-align: center;
   width: 35rem;
   border-radius: 0.5rem;
   top: 0;
   bottom: 0;
   left: 0;
   right: 0;
   position: absolute;
   margin: 4rem auto;
   background-color: #fff;
   padding: 2rem;
   height:45rem;
}

.container .glyphicon-list-alt {
   font-size: 10rem;
   margin-top: 3rem;
   color: #f96145;
}

input {
   width: 100%;
   margin-bottom: 1.4rem;
   padding: 1rem;
   background-color: #ecf2f4;
   border-radius: 0.2rem;
   border: none;
}
h2 {
   margin-bottom: 3rem;
   font-weight: bold;
   color: #ababab;
}
.btn {
   border-radius: 0.2rem;
}
.btn .glyphicon {
   font-size: 3rem;
   color: #fff;
}
.full-width {
   background-color: #8eb5e2;
   width: 100%;
   -webkit-border-top-right-radius: 0;
   -webkit-border-bottom-right-radius: 0;
   -moz-border-radius-topright: 0;
   -moz-border-radius-bottomright: 0;
   border-top-right-radius: 0;
   border-bottom-right-radius: 0;
}

.box {
   position: absolute;
   bottom: 0;
   left: 0;
   margin-bottom: 3rem;
   margin-left: 3rem;
   margin-right: 3rem;
}

span.errMsg {
    color: #f96145;
    font-size: 11px;
}
ログイン画面の追加
Login.html
<!DOCTYPE html>
<html lang="en">
    <head>
        <meta charset="UTF-8">
        <title>カレンダーサンプル - ログイン</title>
      <link rel="stylesheet" href="https://stackpath.bootstrapcdn.com/bootstrap/3.3.7/css/bootstrap.min.css">
        <link rel="stylesheet" href="{{ static_url('css/login.css') }}"/>
      <script type="text/javascript" src="https://stackpath.bootstrapcdn.com/bootstrap/3.3.7/js/bootstrap.min.js"></script>
      <script type="text/javascript" src="http://ajax.googleapis.com/ajax/libs/jquery/1.12.4/jquery.min.js"></script>
        <script type="text/javascript">
            function submitLogin() {
                $("#loginForm").submit();
            }
        </script>
    </head>
    <body>
        <form id="loginForm" method="post" action="/login">
            <div class="jumbotron">
                <div class="container">
                    <span class="glyphicon glyphicon-list-alt"></span>
                    <h2>カレンダーサンプル</h2>
                    <div class="box">
                        {% module xsrf_form_html() %}
                        <input id="inputUserCd" name="user_cd" type="text" placeholder="ユーザーコード">
                        <input id="inputPassword" name="password" type="password" placeholder="パスワード">
                        <span class="errMsg">{{ error_msg }}</span>
                        <button class="btn btn-default full-width">
                            <span class="glyphicon glyphicon-ok"></span>
                        </button>
                    </div>
                </div>
            </div>
        </form>
    </body>
</html>
プログラムの修正
ユーザ情報取得用メソッド追加
データベースからユーザのパスワードや名前を取得するメソッドを追加
MySQLUtil.py
def get_user_password(self, user_cd=""):
    '''
    ユーザーコードからパスワードを取得
    :param user_cd:
    :return:
    '''

    with closing(mysql.connector.connect(**self.config)) as conn:

        c = conn.cursor(dictionary=True)

        sql = "SELECT PASSWORD FROM MST_PASSWORD WHERE USER_CD = '" + user_cd + "'"

        c.execute(sql)

        result = c.fetchone()

        if result == None :
            return None

    return result[r"PASSWORD"]

def get_user_name(self, user_cd=""):
    '''
    ユーザーコードからユーザ名を取得
    :param user_cd:
    :return:
    '''

    with closing(mysql.connector.connect(**self.config)) as conn:

        c = conn.cursor(dictionary=True)

        sql = "SELECT USER_NAME FROM MST_USER WHERE USER_CD = '" + user_cd + "'"

        c.execute(sql)

        result = c.fetchone()

        if result == None :
            return None

    return result[r"USER_NAME"]
認証用クラス/メソッド追加
変更点
1. RequestHandlerを継承した認証用のクラスを追加
2. 認証処理を実施するクラスを追加
3. ログアウト用のクラスを追加
4. 「@tornado.web.authenticated」アノテーションでチェックをするように
Main.py
class AuthBaseHandler(tornado.web.RequestHandler):
    '''
    認証ハンドラー基底クラス
    '''
    cookie_user_cd = "user_cd"

    def get_current_user(self):
        logging.info("AuthBaseHandler [get_current_user]")

        user_cd = self.get_secure_cookie(self.cookie_user_cd)
        if not user_cd:
            return ""
        return user_cd.decode("UTF-8")

    def set_current_user(self, user_cd):
        logging.info("AuthBaseHandler [set_current_user]")

        self.set_secure_cookie(self.cookie_user_cd, user_cd)

    def clear_current_user(self):
        logging.info("AuthBaseHandler [clear_current_user]")

        self.clear_cookie(self.cookie_user_cd)


class AuthLoginHandler(AuthBaseHandler):
    '''
    ログインハンドラー
    '''

    def get(self):
        logging.info("AuthLoginHandler [get]")

        self.render("Login.html", error_msg="")

    def post(self):
        logging.info("AuthLoginHandler [post]")

        self.check_xsrf_cookie()

        # 認証処理
        input_user_cd = self.get_argument("user_cd")
        input_password = self.get_argument("password")

        mysql = MySQLUtil()
        password = mysql.get_user_password(input_user_cd)

        # 入力されたパスワードと保存されているパスワードをチェック
        is_auth = False if input_password != password else True

        if is_auth:
            self.set_current_user(input_user_cd)
            self.redirect("/main")
        else:
            self.render("Login.html", error_msg="ユーザーコードまたはパスワードが間違っています。")

class AuthLogoutHandler(AuthBaseHandler):

    def get(self):
        self.clear_current_user()
        self.redirect('/login')
カレンダー取得処理の修正
Main.py
    class GetCalendar(AuthBaseHandler):
        """
        カレンダー取得
        """

        def initialize(self):
            logging.info("GetCalendar [initialize]")

        @tornado.web.authenticated
        def get(self):
            logging.info("GetCalendar [get]")

            mysql = MySQLUtil()

            arg = self.request.arguments
            start = arg["start"][0].decode("UTF-8")
            end = arg["end"][0].decode("UTF-8")

            user_cd = self.get_current_user()

            data = mysql.get_schedule(start, end, user_cd)
            json_data = json.dumps(data, default=support_datetime_default)

            self.write(json_data)


URLハンドリングの追加

Main.py

    app = tornado.web.Application([
        (r"/login", AuthLoginHandler),
        (r"/logout", AuthLogoutHandler),
        (r"/main", MainHandler),
        (r"/getCalendar", GetCalendar),
        (r"/regist", RegistSchedule),
        (r"/update", UpdateSchedule),
        (r"/delete", DeleteSchedule),
    ],
        template_path=os.path.join(os.getcwd(), "templates"),
        static_path=os.path.join(os.getcwd(), "static"),
        login_url="/login",
        cookie_secret="adfaskljfwepmaldskf:as;k",
        xsrf_cookies=True
    )
非同期通信時のXSRF設定
Ajax通信でXSRFパラメータを送信するように
script.js
/**
 * リクエスト送信.
 */
function sendAjaxRequest(method, eventData) {

    var cal = $("#calendar").fullCalendar("getView");
    eventData.searchStart = cal.start;
    eventData.searchEnd = cal.end;

    // 処理名を設定
    var methodName = "登録";
    if (method == "update") {
        methodName = "更新"
    } else if (method == "delete") {
        methodName = "削除"
    }

    $.ajax({
        url: "http://localhost:8080/" + method,
        type: "POST",
        headers: {'X-XSRFToken' : $("*[name=_xsrf]")[0].value },
        data: JSON.stringify(eventData),
        success: function(jsonResponse) {
            // カレンダー再描画
            $('#calendar').fullCalendar('removeEvents');
            $('#calendar').fullCalendar('renderEvents', $.parseJSON(jsonResponse) )
            $('#inputScheduleForm').modal('hide');
            alert("予定を" + methodName + "しました。");
        },
        error: function() {
            alert("予定の" + methodName + "に失敗しました。");
        }
    });
    $('#calendar').fullCalendar('unselect');
}
起動してみる
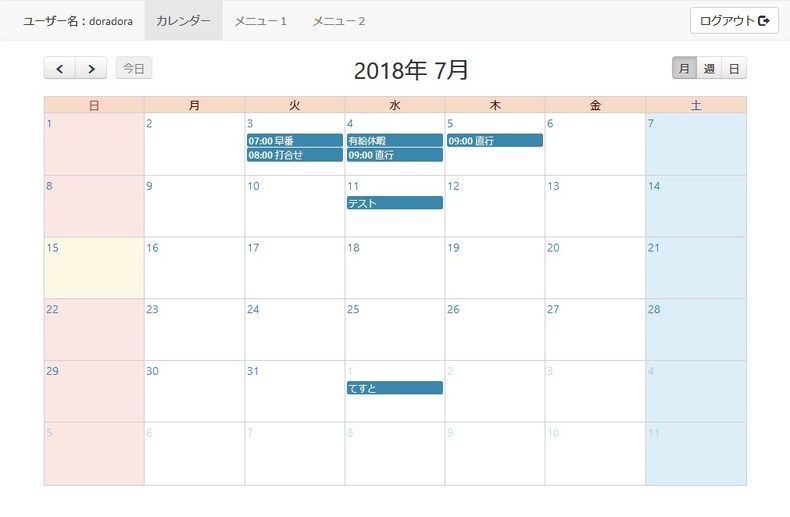
ヘッダーを追加して、ユーザ名を表示、あとは適当にメニューを追加してみました。
まとめ
ひとまず、ここまででカレンダーは終わりにしようかなと思ってます。
そのうちなんかサービスが作れたらいいな。
ソースは整理して別途 Github にアップする予定です。
何かの参考になれば。
ではでは。