【CentOS】CentOS7.5に Nginx をインストールする
おはようございます。
昨日に引き続き、
CentOSにNginxをインストールしてみます。
ひとまずはデフォルトのページが表示できるところまで。
スポンサーリンク
Nginxのインストール
リポジトリの作成
リポジトリの情報ファイルを作成します。
サーバーにSSHで接続、rootユーザーでログインして次のコマンドを実行します。
1 | $vi/etc/yum.repos.d/nginx.repo |
ファイルの内容:
[nginx]
name=nginx repo
baseurl=http://nginx.org/packages/mainline/centos/7/$basearch/
gpgcheck=0
enabled=1
リポジトリの確認
リポジトリが正常に追加されたかどうか、次のコマンドを実行して確認します。
1 | $yum search nginx |
結果
1 2 3 4 5 6 7 8 9 10 11 12 13 14 15 16 17 18 19 20 21 22 23 24 25 26 27 28 29 30 31 32 33 34 35 36 37 38 39 40 41 42 43 44 45 46 47 48 49 50 | 読み込んだプラグイン:fastestmirror Determining fastest mirrors epel/x86_64/metalink |8.8kB 00:00 *elrepo:ftp.ne.jp *epel:ftp.iij.ad.jp base |3.6kB 00:00 elrepo |2.9kB 00:00 epel |3.2kB 00:00 extras |3.4kB 00:00 nginx |2.9kB 00:00 updates |3.4kB 00:00 (1/5):epel/x86_64/updateinfo |932kB 00:00 (2/5):epel/x86_64/primary |3.6MB 00:00 (3/5):elrepo/primary_db |530kB 00:01 (4/5):updates/7/x86_64/primary_db |6.0MB 00:00 (5/5):nginx/x86_64/primary_db |122kB 00:00 epel 12742/12742 ==============================N/Smatched:nginx============================== collectd-nginx.x86_64:Nginx plugin forcollectd munin-nginx.noarch:NGINX support forMunin resource monitoring nextcloud-nginx.noarch:Nginx integration forNextCloud nginx-all-modules.noarch:Ameta packagethat installs all available Nginx modules nginx-debug.x86_64:debug version of nginx nginx-debuginfo.x86_64:Debug information forpackagenginx nginx-filesystem.noarch:The basic directory layout forthe Nginx server nginx-mod-http-geoip.x86_64:Nginx HTTP geoip module nginx-mod-http-image-filter.x86_64:Nginx HTTP image filter module nginx-mod-http-perl.x86_64:Nginx HTTP perl module nginx-mod-http-xslt-filter.x86_64:Nginx XSLT module nginx-mod-mail.x86_64:Nginx mail modules nginx-mod-stream.x86_64:Nginx stream modules nginx-module-geoip.x86_64:nginx GeoIP dynamic modules nginx-module-geoip-debuginfo.x86_64:Debug information forpackagenginx-module-geoip nginx-module-image-filter.x86_64:nginx image filter dynamic module nginx-module-image-filter-debuginfo.x86_64:Debug information forpackagenginx-module-image-filter nginx-module-njs.x86_64:nginx njs dynamic modules nginx-module-njs-debuginfo.x86_64:Debug information forpackagenginx-module-njs nginx-module-perl.x86_64:nginx Perl dynamic module nginx-module-perl-debuginfo.x86_64:Debug information forpackagenginx-module-perl nginx-module-xslt.x86_64:nginx xslt dynamic module nginx-module-xslt-debuginfo.x86_64:Debug information forpackagenginx-module-xslt nginx-nr-agent.noarch:NewRelic agent forNGINX andNGINX Plus owncloud-nginx.noarch:Nginx integration forownCloud pcp-pmda-nginx.x86_64:Performance Co-Pilot(PCP)metrics forthe Nginx Webserver python2-certbot-nginx.noarch:The nginx plugin forcertbot nginx.x86_64:High performance web server unit.x86_64:NGINX Unit unit-devel.x86_64:NGINX Unit(development tools) Name andsummary matches only,use"search all"foreverything. |
上記のように出力されればOKです。
インストール
次のコマンドを実行します。
1 | $yum-yinstall nginx |
結果
1 2 3 4 5 6 7 8 9 10 11 12 13 14 15 16 17 18 19 20 21 22 23 24 25 26 27 28 29 30 31 32 33 34 35 36 37 38 39 40 41 42 43 44 45 46 47 48 49 50 51 52 53 54 55 56 57 58 59 | 読み込んだプラグイン:fastestmirror Loading mirror speeds from cached hostfile epel/x86_64/metalink |9.5kB 00:00:00 *elrepo:ftp.ne.jp *epel:ftp.iij.ad.jp base |3.6kB 00:00:00 elrepo |2.9kB 00:00:00 epel |3.2kB 00:00:00 extras |3.4kB 00:00:00 nginx |2.9kB 00:00:00 updates |3.4kB 00:00:00 依存性の解決をしています -->トランザクションの確認を実行しています。 --->パッケージnginx.x86_641:1.15.5-1.el7_4.ngxをインストール -->依存性解決を終了しました。 依存性を解決しました ===================================================================================================================== Package アーキテクチャー バージョン リポジトリー 容量 ===================================================================================================================== インストール中: nginx x86_64 1:1.15.5-1.el7_4.ngx nginx 759k トランザクションの要約 ===================================================================================================================== インストール 1パッケージ 総ダウンロード容量:759k インストール容量:2.7M Downloading packages: nginx-1.15.5-1.el7_4.ngx.x86_64.rpm |759kB 00:00:04 Running transaction check Running transaction test Transaction test succeeded Running transaction 警告:RPMDBはyum以外で変更されました。 インストール中 :1:nginx-1.15.5-1.el7_4.ngx.x86_64 1/1 ---------------------------------------------------------------------- Thanks forusing nginx! Please find the official documentation fornginx here: *http://nginx.org/en/docs/ Please subscribe tonginx-announce mailing list toget the most important news about nginx: *http://nginx.org/en/support.html Commercial subscriptions fornginx are available on: *http://nginx.com/products/ ---------------------------------------------------------------------- 検証中 :1:nginx-1.15.5-1.el7_4.ngx.x86_64 1/1 インストール: nginx.x86_641:1.15.5-1.el7_4.ngx 完了しました! |
ミラーサイトが見つからないエラーが発生する場合がありますが、
最終的に上記のように出力されればOKです。
ポートの解放
デフォルトの状態ではHTTPのポート(80)がファイヤーウォールで遮断されている可能性があります。
まず、次のコマンドを実行して状態を確認します。
1 | $firewall-cmd--list-all |
結果
1 2 3 4 5 6 7 8 9 10 11 12 13 | public(active) target:default icmp-block-inversion:no interfaces:eth0 eth1 sources: services:ssh dhcpv6-client ports: protocols: masquerade:no forward-ports: source-ports: icmp-blocks: rich rules: |
services に http が表示されていないので、現時点では遮断されている状態となります。
解放するコマンドを実行
1 2 3 | $firewall-cmd--add-service=http--permanent $firewall-cmd--reload $firewall-cmd--list-all |
結果
1 2 3 4 5 6 7 8 9 10 11 12 13 | public(active) target:default icmp-block-inversion:no interfaces:eth0 eth1 sources: services:ssh dhcpv6-client http ports: protocols: masquerade:no forward-ports: source-ports: icmp-blocks: rich rules: |
services に http が追加されればOKです。
自動起動の設定
サーバー起動時に Nginx のサービスも自動で起動するように設定します。
次のコマンドを実行
1 | $systemctl enable nginx |
結果
1 | Created symlink from/etc/systemd/system/multi-user.target.wants/nginx.service to/usr/lib/systemd/system/nginx.service. |
上記のように出力されればOKです。
WEBページの表示確認
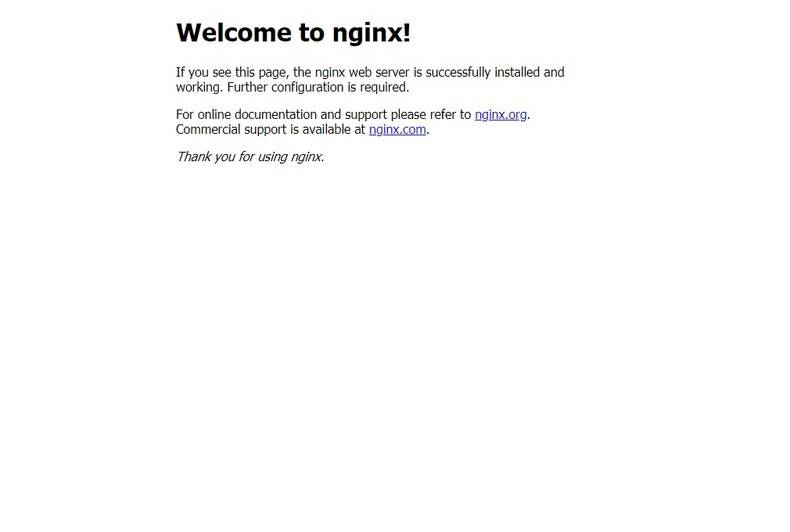
http://[ホスト or IP]/ にアクセスし、ページが表示されるか確認します。

無事に Welcom ページが表示されました。
まとめ
特にハマる要素もなく
簡単にインストール、起動することができました。
次回は Tomcat をインストールする予定です。
ではでは。
スポンサーリンク
関連するコンテンツ


ディスカッション
コメント一覧
まだ、コメントがありません